
How long does setup take?
About an hour for the basics: install the theme, fill in your organization’s details, set your colors and fonts, and build your first page from a template.
Step 1: Create a child theme
After the theme is installed from the Marketplace, create a child theme before anything else. Marketplace themes are locked, so their code can’t be edited directly. A child theme is a copy of AEO First that you, a developer or our team can change, while AEO First itself stays untouched and keeps receiving updates.
A child theme also has its own theme settings, header and footer, so everything you set up in the next steps belongs to it, and is kept when AEO First is updated.
How to create the child theme
- Go to Content > Design Manager.
- Find the theme in the file tree: open @marketplace > Adepto Digital > aeo-first, or search for aeo-first.
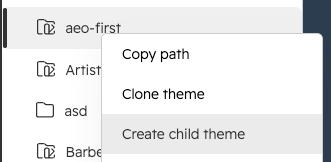
- Right-click the theme folder and choose Create child theme.
- Give the child theme a name, for example your company name, and click Create child theme.
Use the child theme from now on
- Choose the child theme when you edit theme settings and when you create pages.
- Select its blog and system page templates.
- Make any code changes only in the child theme’s files.
Step 2: Set your theme settings
Theme settings control the look of every page at once.
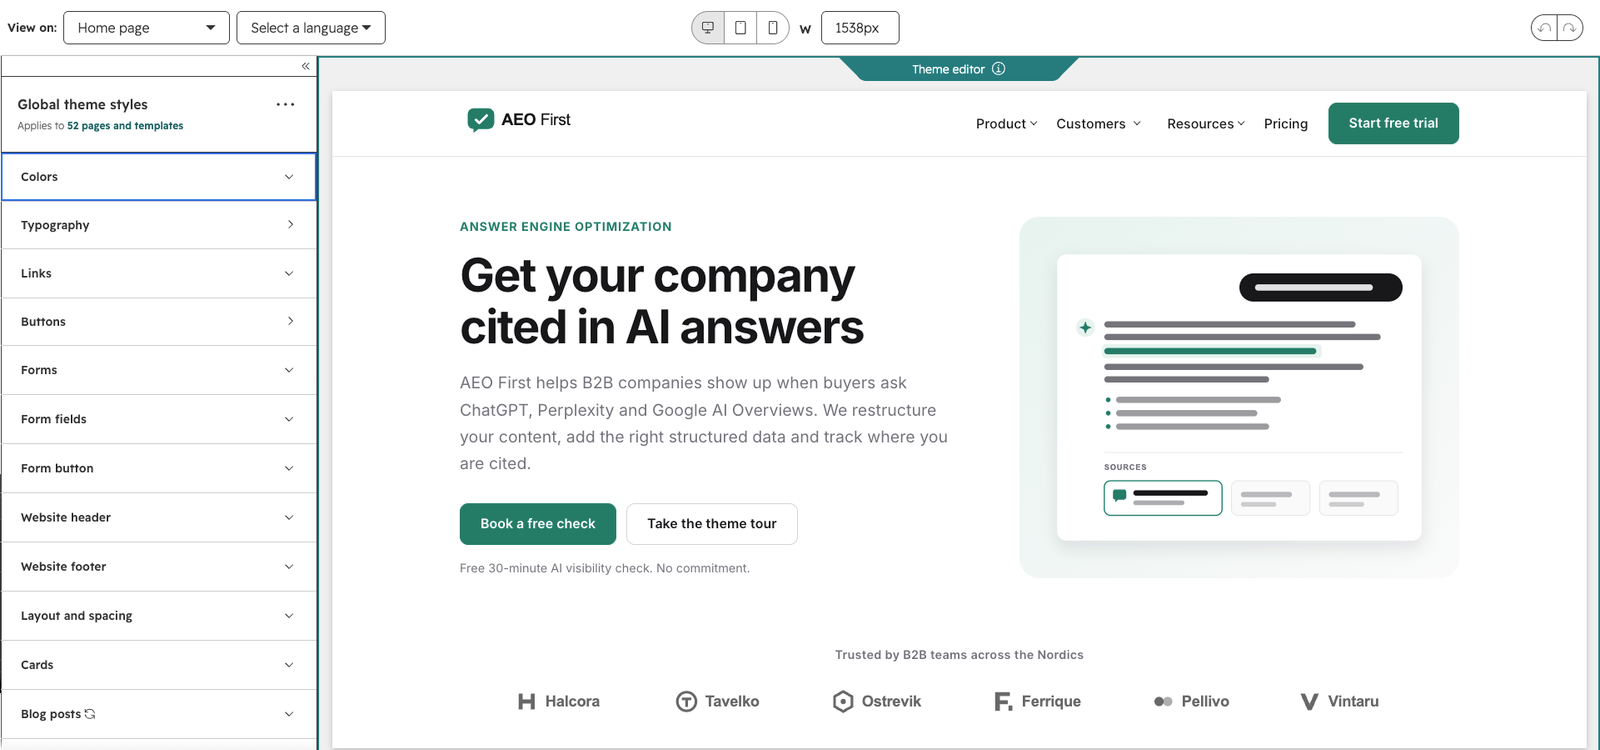
- Go to Settings > Content > Themes & Modules, find your child theme and click Edit theme.
- Work through the groups:
- Colors: your accent color, text colors, backgrounds and the light text used on dark backgrounds.
- Typography: heading and body fonts, sizes for each heading level, line height, mobile scaling.
- Links: underline style and the arrow used on text links.
- Buttons: primary and secondary buttons, including hover colors and corner radius.
- Forms, form fields and form button: how every HubSpot form on the site looks.
- Header: logo height, colors, sticky header, header font.
- Footer: colors, font and logo height.
- Layout and spacing: content width, side padding, section spacing, corner radius, section heading width.
- Cards: default background, border, padding and shadow of cards.
- Blog posts: text width, and how the featured image is shown (below or above the title, as a hero, width and shape).
- Motion: entrance animations (or none), their duration and distance.
- Click Apply changes, then Publish to update every page that uses the theme.
Using your own font?
Open any page in the page editor and scroll to the bottom: click the Custom fonts note (it only shows while editing). Upload the font files (WOFF2, WOFF, TTF or OTF) with their family name, weight and style, then under Use the fonts choose which family to use for headings and for body text.
Step 3: Create a page
- Go to Content > Website Pages and click Create.
- Choose your child theme (based on AEO First) as the theme.
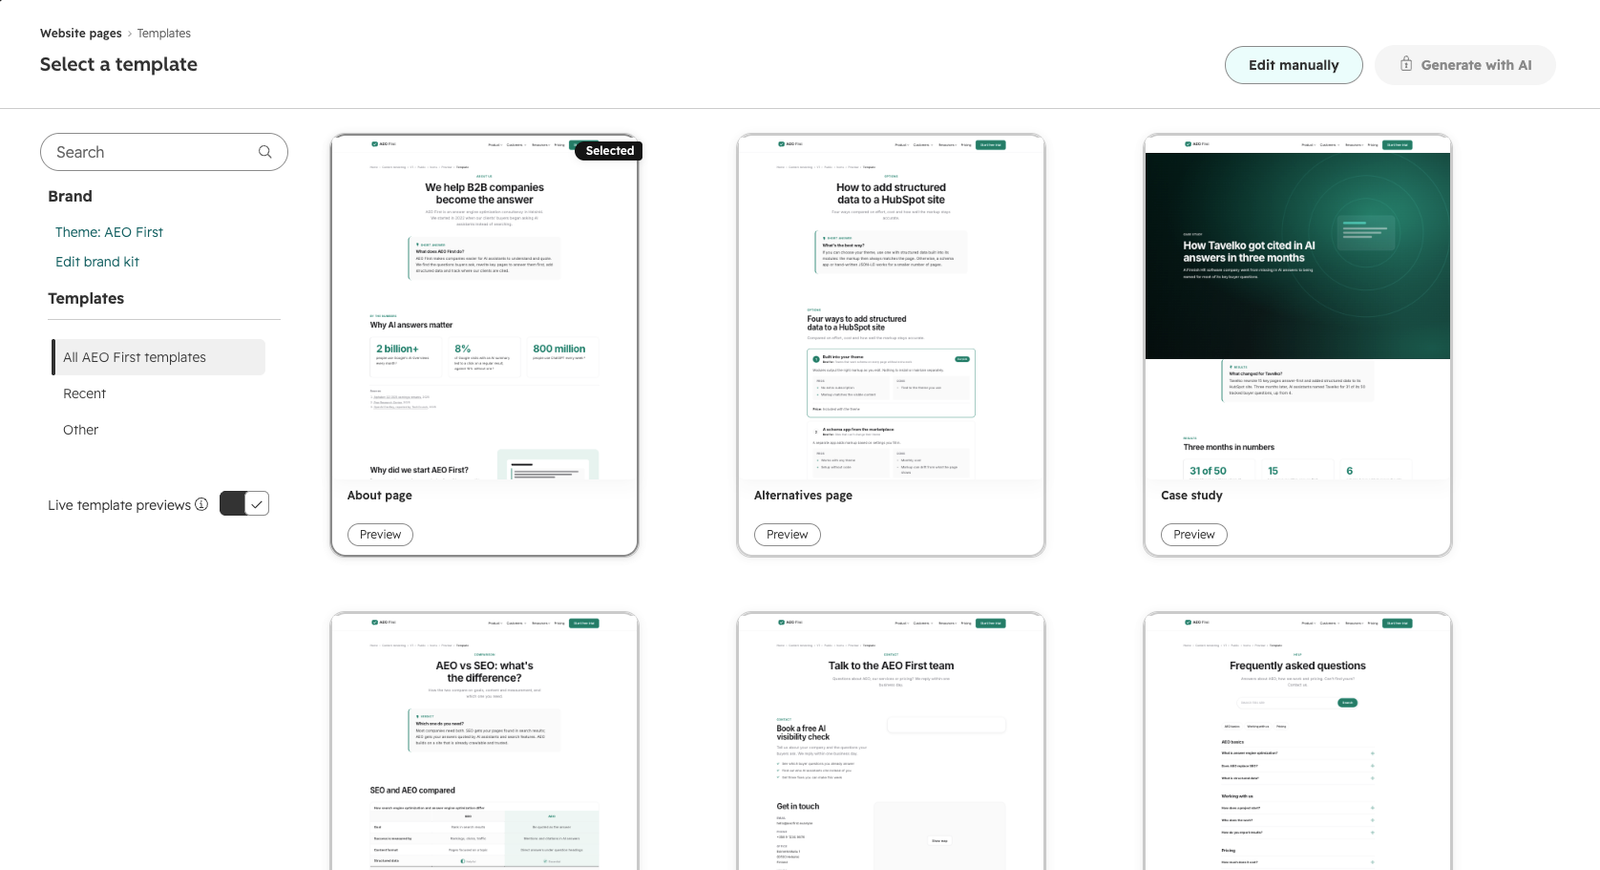
- Pick a template. Each one comes with realistic example content you can replace:
| Template | Use it for |
|---|---|
| Home page | Your front page |
| Theme tour (all modules) | Seeing every module, with notes on what each does |
| About page | Your story, team and numbers |
| Services or product overview | All your services or products on one page |
| Service or product page | One service or product in detail, with Service structured data and a price |
| Contact page | Form, contact details and map |
| FAQ hub | All your FAQs, grouped by category |
| Landing page | A campaign page with a simplified header and footer |
| Landing page (form in the hero) | A download or sign-up page with the form at the top |
| Pillar page | A long guide that links to related articles |
| Comparison page (X vs Y) | Comparing two options |
| Alternatives page | Ranking several options |
| How-to guide | Step-by-step instructions with HowTo structured data |
| Glossary and Glossary term page | An A–Z of terms, and one page per term |
| Pricing page | Plans with a monthly/yearly switch |
| Case study | A customer story with results |
| Resource library | Guides, templates and events with filters |
| Membership access denied / signed out | Pages for private content (Content Hub Enterprise) |
- Click a template and choose Edit manually. Or click Preview to see it first, and choose Edit manually from there.
Step 4: Edit a page
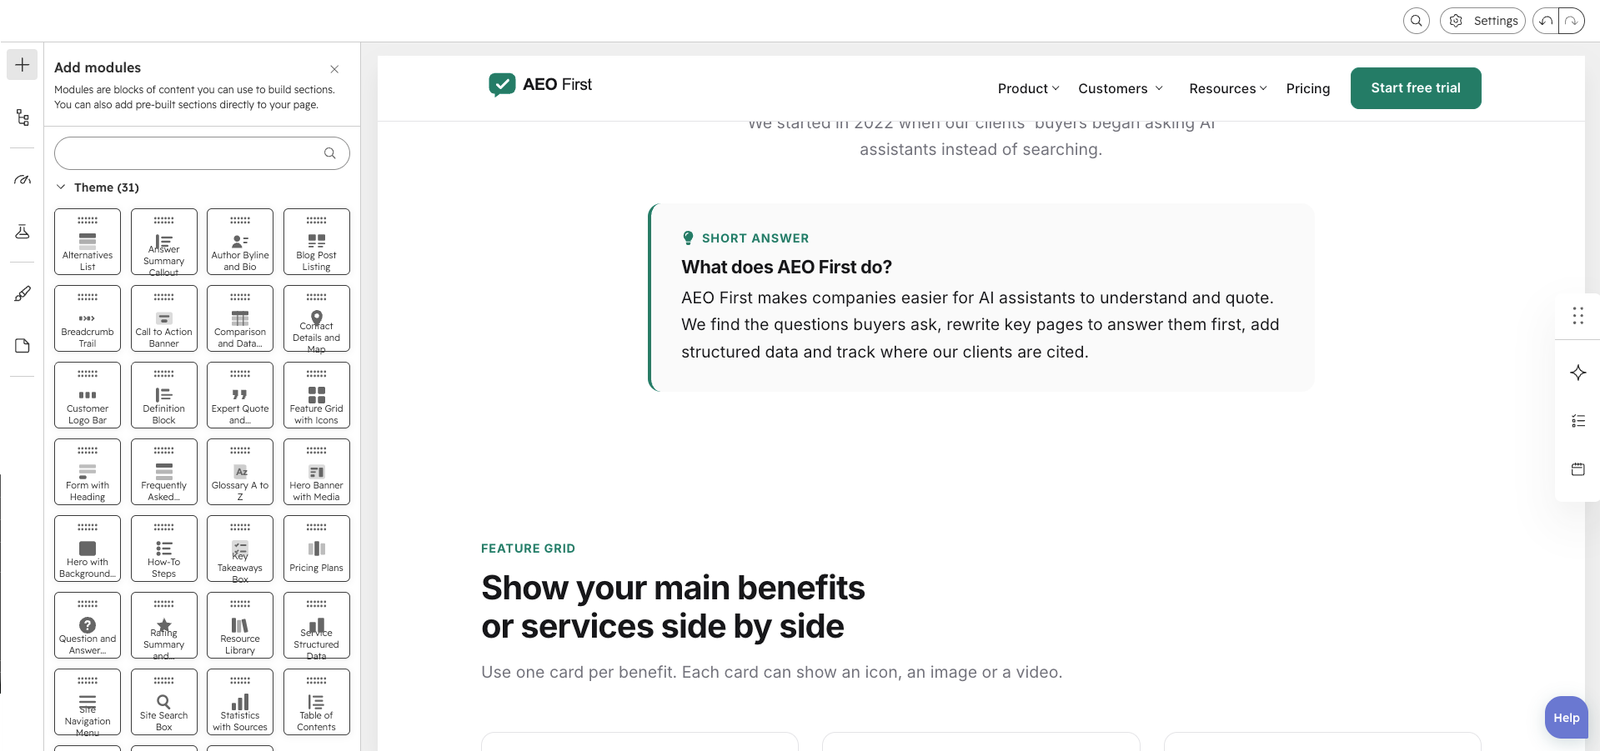
AEO First pages are built from sections and modules you can drag, drop, add and remove.
- Name the page: start by giving the page a name. This is its internal name, only visible in HubSpot, and you can change it any time in the page settings (Step 7).
- Add a section or module: click the + in the left sidebar and drag a module or a ready-made section onto the page.
- Edit a module: click it. The sidebar shows its settings in two tabs:
- Content: text, images, buttons, links and options such as structured data.
- Styles: background (color, gradient, image or a preset), text colors, spacing, alignment, width, borders, shadow and entrance animation.
- Only relevant options show: for example, video settings only appear once you choose Video as the media.
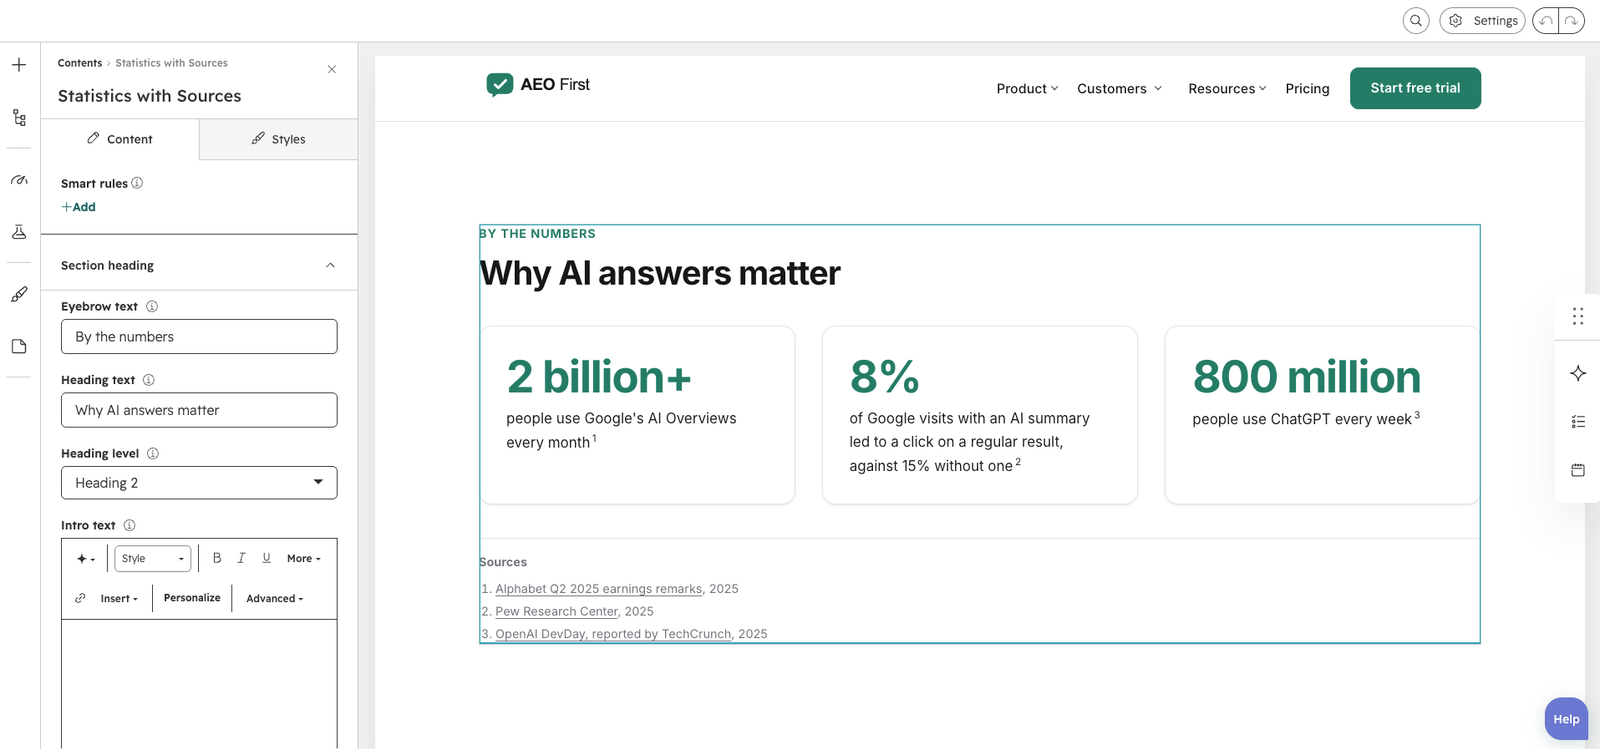
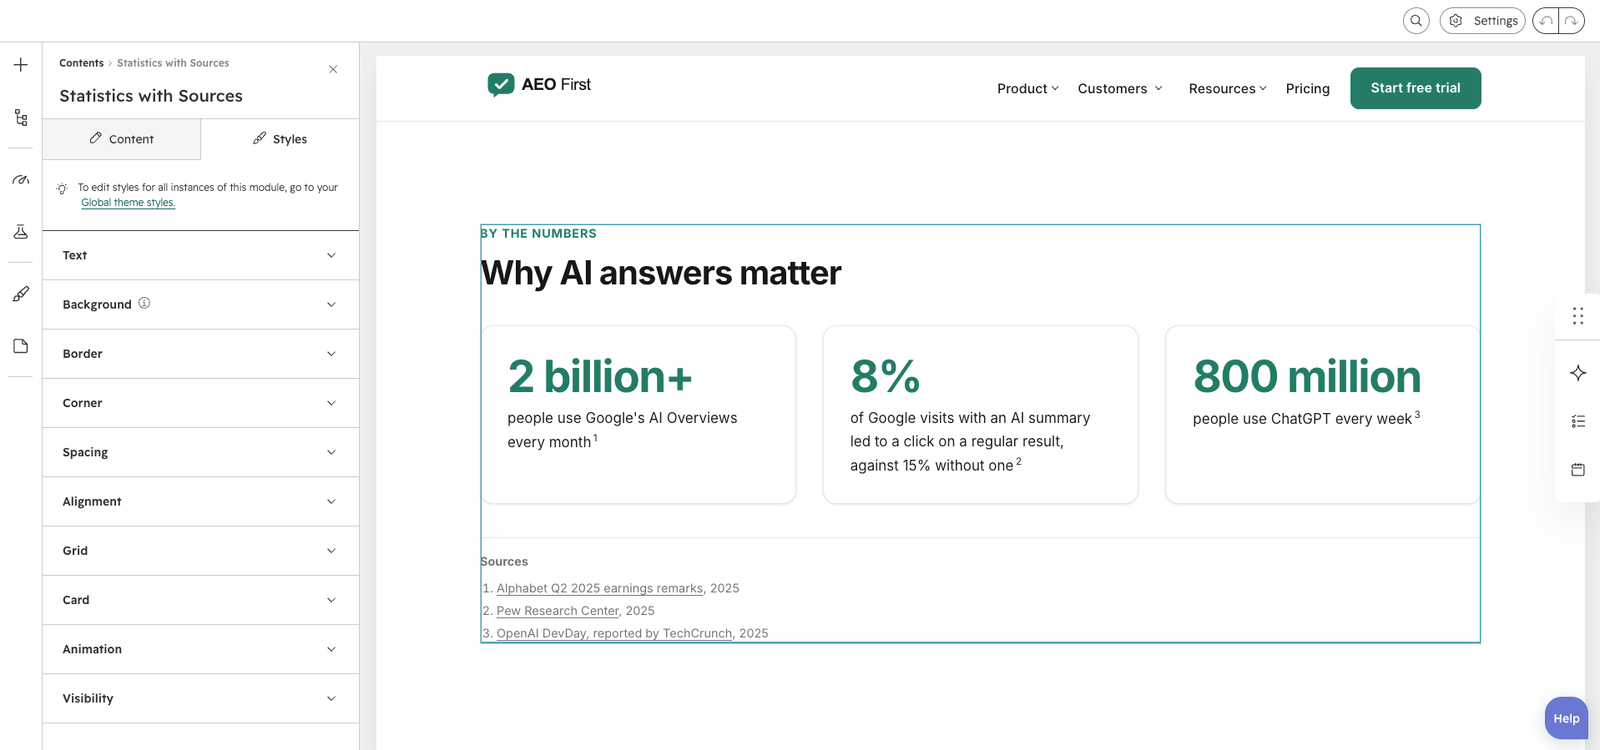
Every image can be a video: wherever a module shows an image, you can choose a YouTube video, an uploaded video file or an embed instead.
Step 5: Add your organization’s details (structured data)
This is the most important step for answer engine optimization. It tells search engines and AI assistants who runs the site, and it’s added to every page automatically.
- Open any page built with AEO First in the page editor.
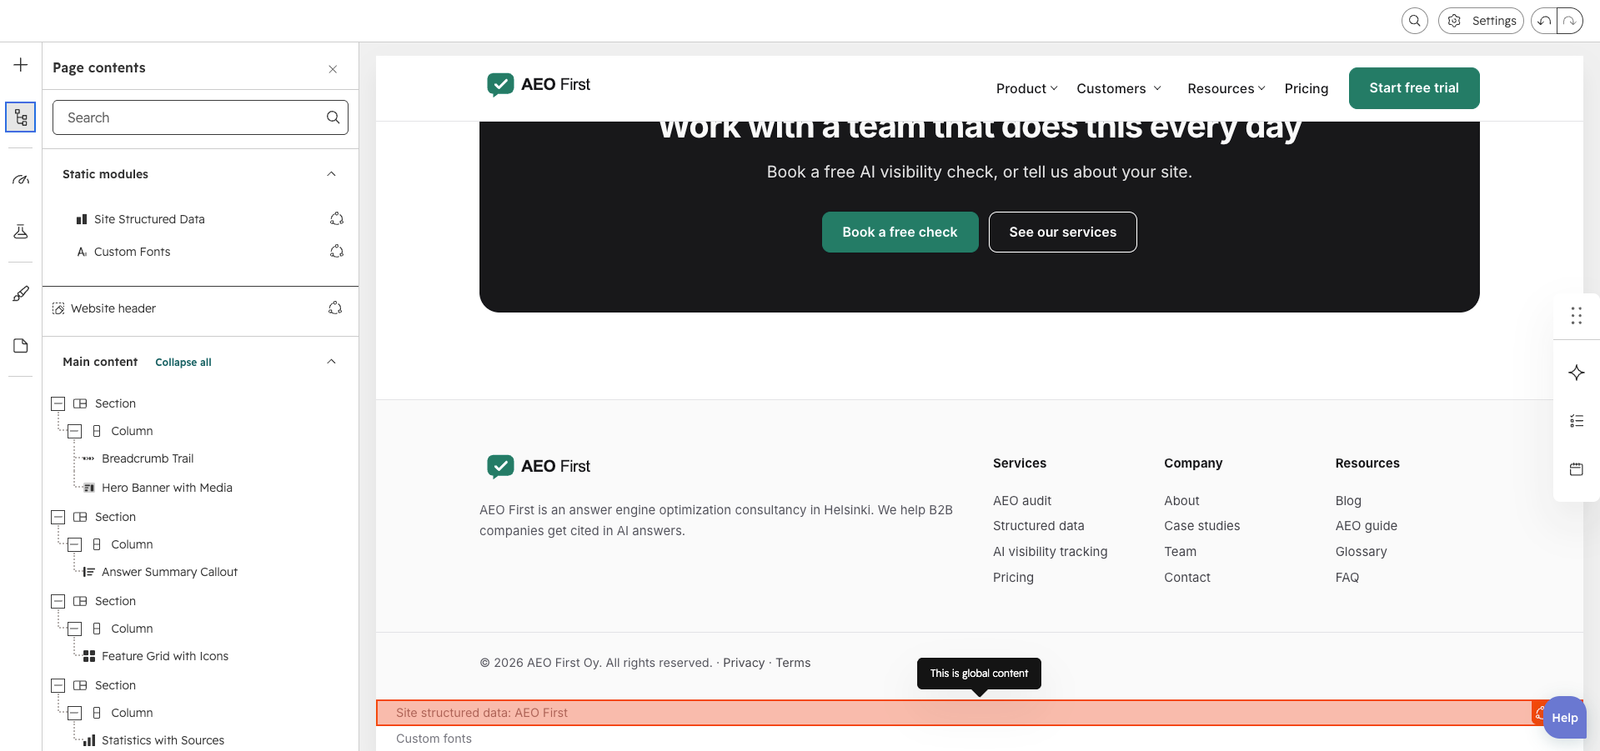
- Near the bottom of the page you’ll see a small note: Site structured data. It only shows while editing. Click it, or open it from the left sidebar, where it’s the first module.
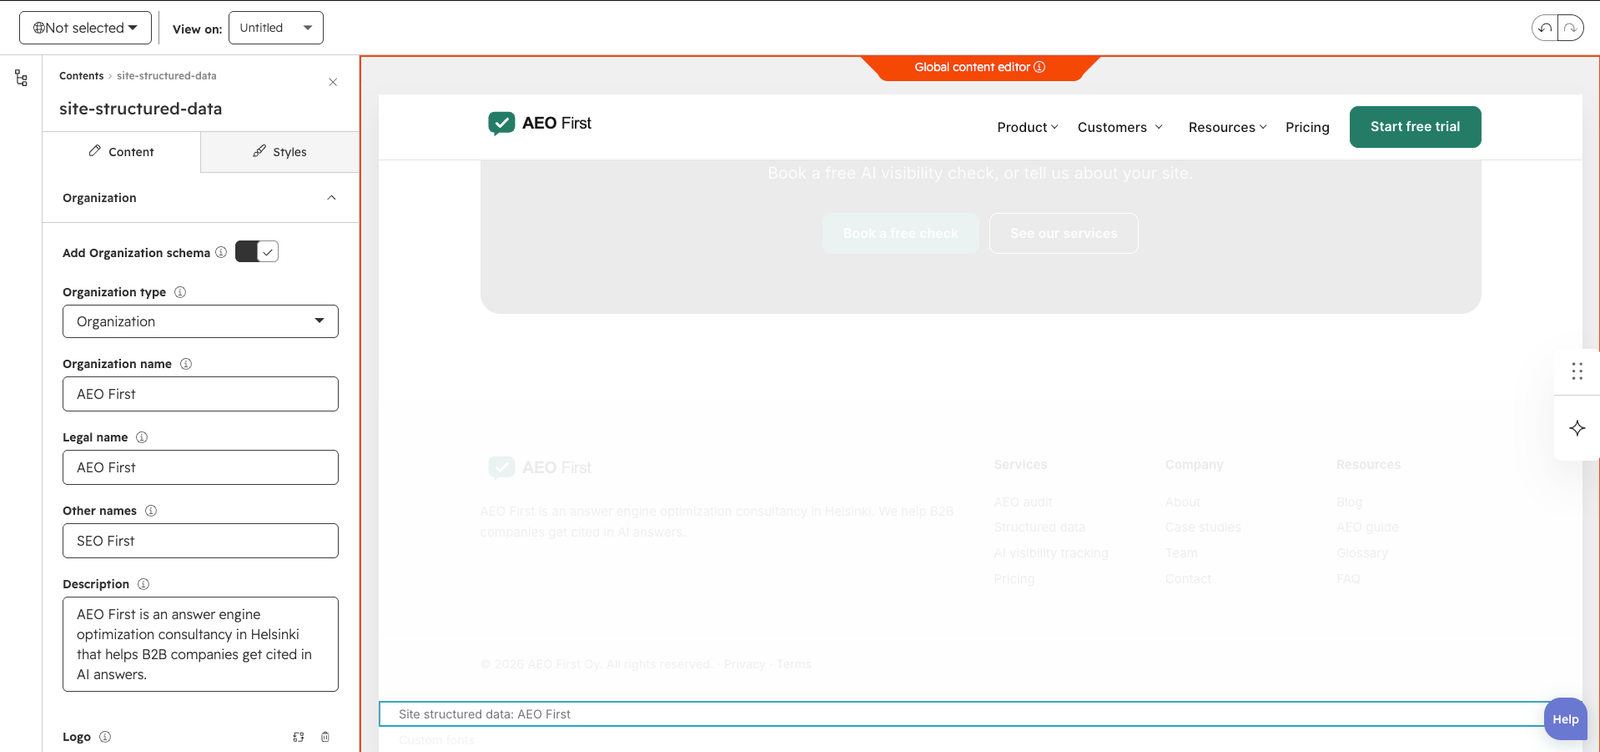
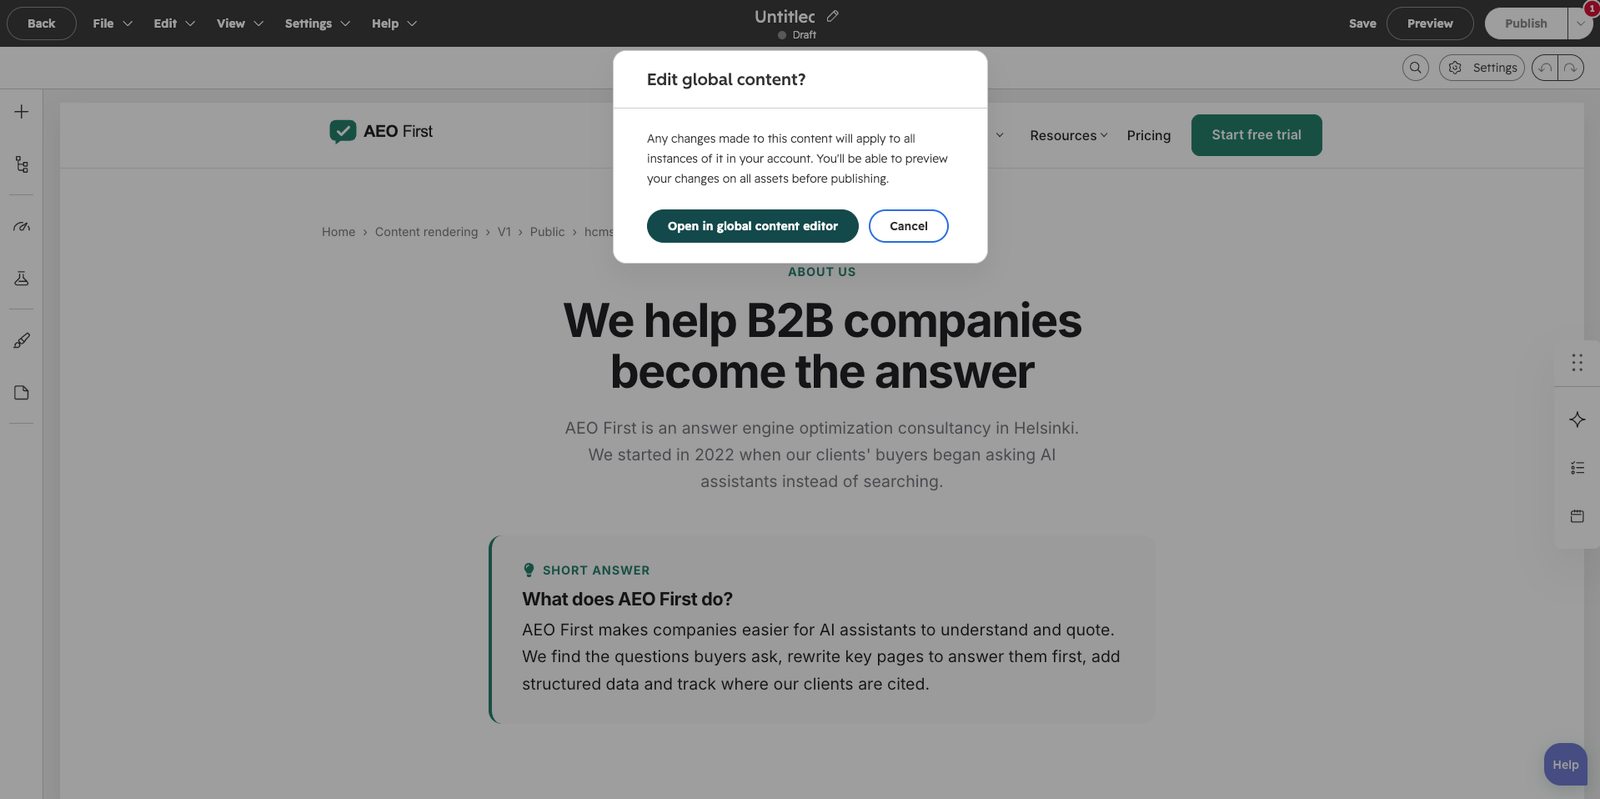
- HubSpot asks whether to edit global content. Confirm: changes apply to every page.
- Fill in:
- Organization: name, type (for example Professional service or Local business), logo, description.
- Contact and address: email, phone and address, if you want them in the markup.
- Profiles: links to your LinkedIn, X, YouTube and other official profiles. These help engines confirm who you are.
- Publish the page to save. HubSpot asks for the page settings first (Step 7).
Site structured data is a global module: you fill it in once, in one place, and it’s applied to every page on the site.
Tip: test any page in Google’s Rich Results Test (search.google.com/test/rich-results). You should see an Organization, plus FAQ, how-to or breadcrumbs wherever those modules are used.
Step 6: Edit the header and footer
The header and footer are shared by every page.
- In the page editor, click the header (or footer).
- Choose Open in global content editor.
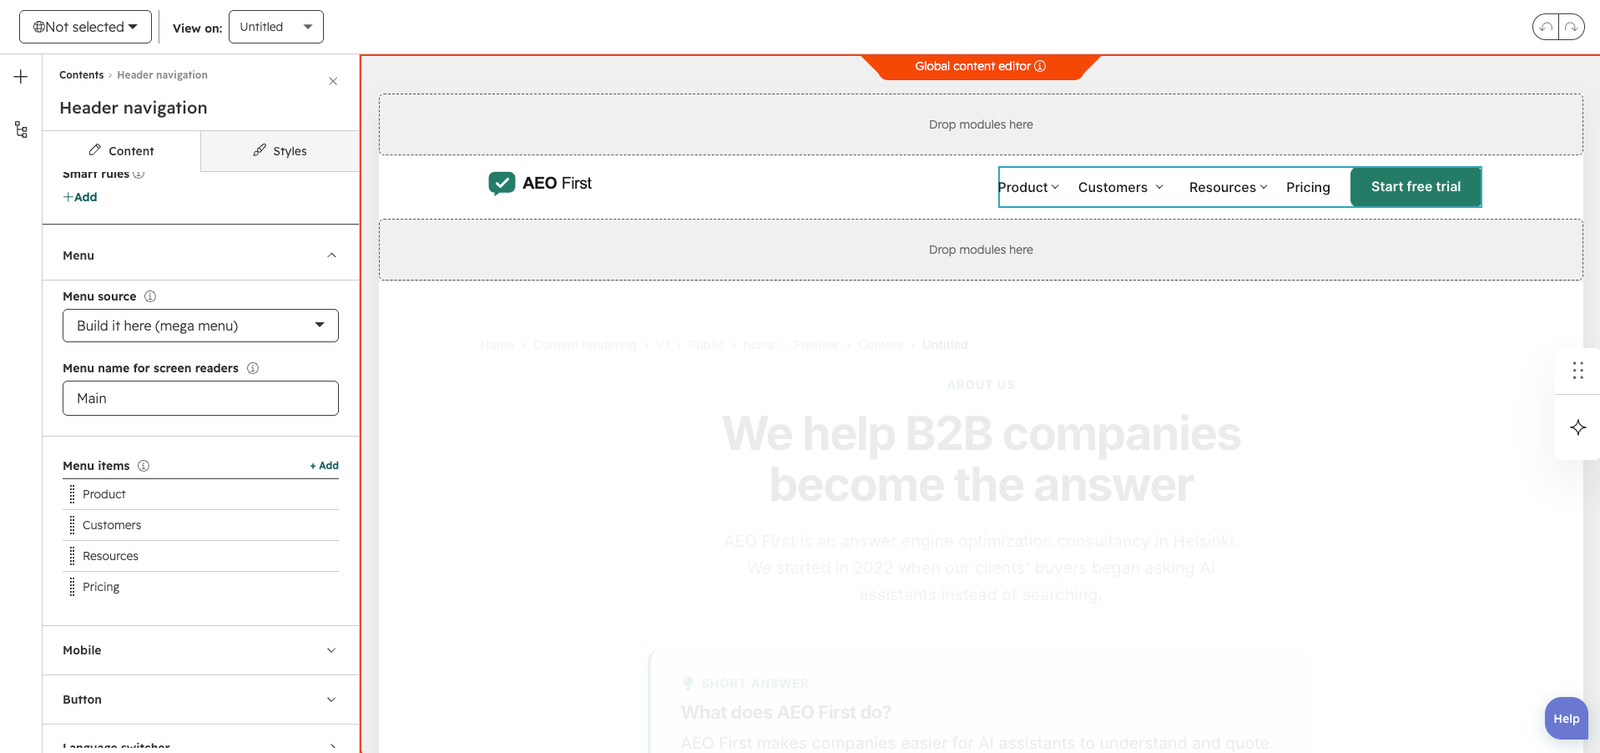
- In the header’s navigation module you can:
- Use a HubSpot navigation menu, or build the menu in the module with dropdowns and mega menus (columns, icons, descriptions and a featured card).
- Show a button at the end of the menu.
- Set up the language switcher (shown only when a page has translations): position next to the button, icon, codes, names or flags.
- Publish the global content to update every page.
The landing page templates use a simpler header and footer with their own drag-and-drop areas.
Step 7: Add the page settings
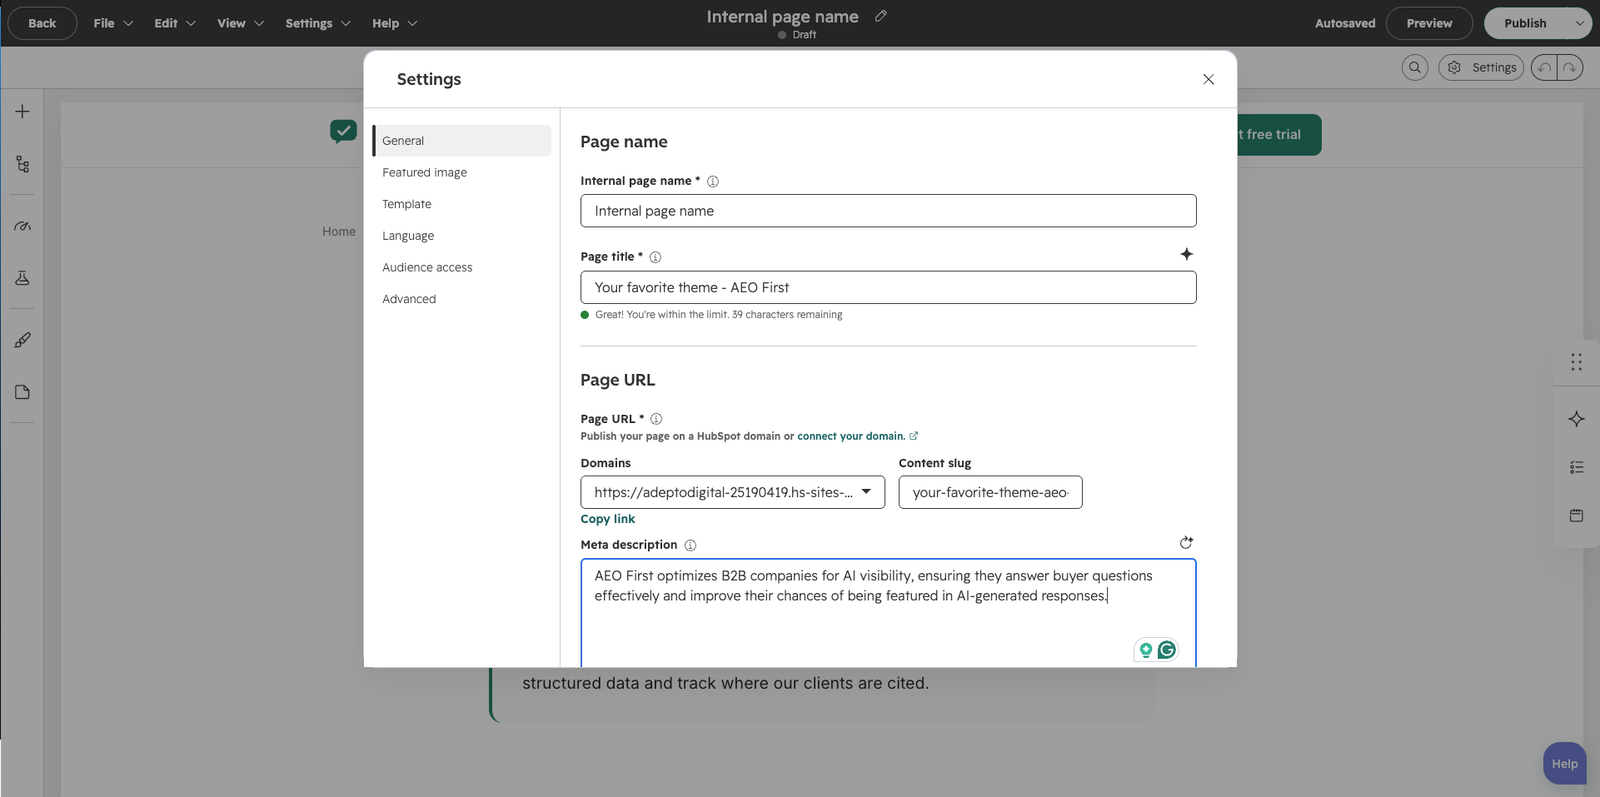
Before you can publish a page, HubSpot needs a few details. Click Settings in the editor and fill in:
- Internal name: the page’s name in HubSpot, only visible to your team.
- Page title: shown in search results and on the browser tab. Keep it under about 60 characters.
- Meta description: the short summary shown in search results, around 150 characters.
- URL: the page’s address. Keep it short and descriptive.
Then click Publish.
Step 8: Set up the blog
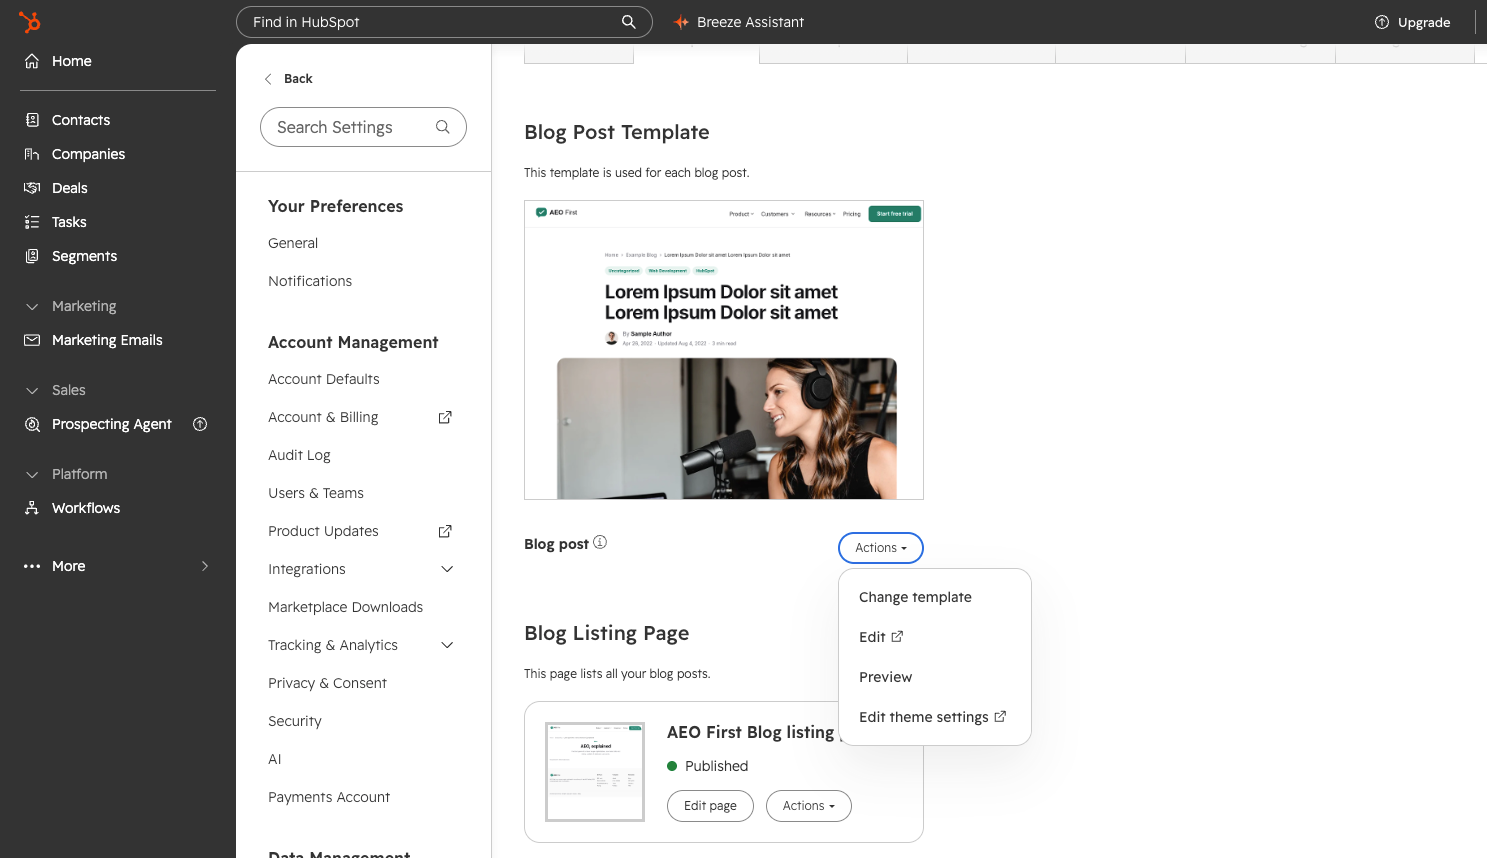
- Go to Settings > Content > Blog > Templates and choose:
- Blog post for posts
- Blog listing for the listing page
- Write a post as usual. The AEO First post template adds:
- A short answer box that shows the post summary (in the post’s settings), unless you write a different answer in the box.
- Key takeaways and an FAQ section (with FAQPage structured data) you can fill in per post.
- The author byline and author box from the author’s profile (Settings > Content > Blog > Authors).
- BlogPosting structured data, with author, dates and image, added automatically.
- Change how the featured image appears in Theme settings > Blog posts.
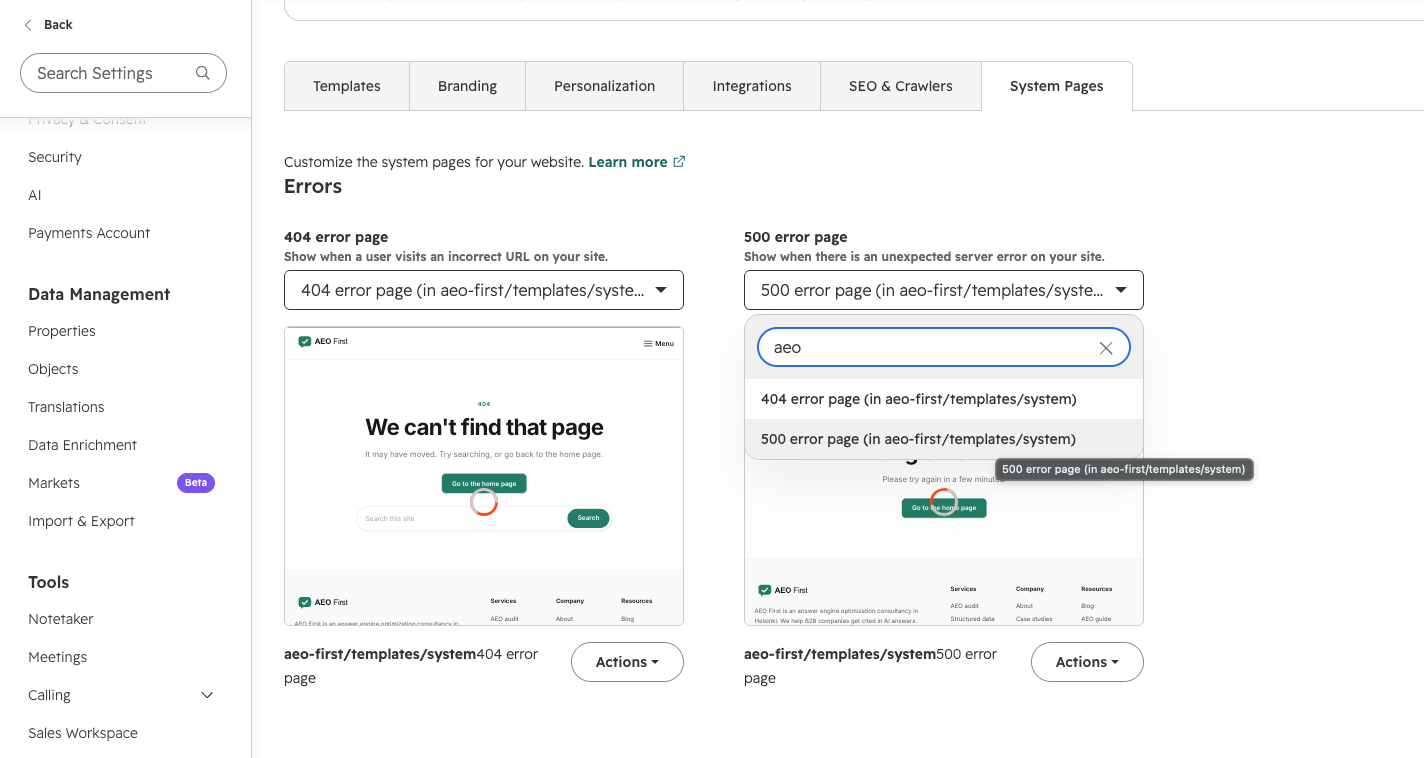
Step 9: Choose the system pages
AEO First includes templates for HubSpot’s system pages, so error and email pages match your site.
Go to Settings > Content > Pages > System pages and select the AEO First templates for: 404 error, 500 error, password prompt, search results, email subscription preferences, subscription confirmation and backup unsubscribe.
Using private content (Content Hub Enterprise)? Choose the membership templates under Settings > Content > Private content > Templates: sign in, registration, password reset request and create new password.
Step 10: Make your pages answer-first
The modules that help AI assistants and search features quote you:
- Answer summary: a two- or three-sentence answer at the top of a page.
- Question-led section: a heading written as the buyer’s question, with the answer right below it.
- FAQ accordion: questions and answers with FAQPage structured data.
- How-to steps, Definition block, Glossary, Alternatives list, Comparison table: each adds the matching structured data or HTML that engines read easily.
- Statistics with sources, Expert quote and reviewer, Author byline: trust signals: sources, named experts and authors.
- Service structured data: add it to a page about one service or product.
A simple routine: pick the ten questions your buyers ask most, give each one a page or a section with the question as the heading, answer it in the first two sentences, and test the page in Google’s Rich Results Test.
The Theme tour template shows every module with a note on how it helps.
Need help?
Every purchase includes email support for as long as you use the theme, plus 2 hours of customization. Visit the support page or email contact@adeptodigital.com.